DeskTop Organizer Plans - Two Secrets For Constructing A Structure Quickly

Cut each cleat a hair shorter than its theoretical length and fasten it to panel side. Next, glue and screw the seat slats to seat braces. Trim door, if necessary, so it fits loosely between front and back. Put a biscuit in the slot and dry-fit leg and seat rail to make sure rail is oriented correctly. It's about 20 percent harder, and stronger, heavier and more moisture resistant than standard lumber. You'll see machines designed for wider and narrower belts, (https://woodcraftdiagrams.com/writing-desk-woodworking-plans-blueprints) but they're for specialized tasks. Use a level to check for irregularities like a sloping floor or an uneven wall.
Instead, look for a special abrasive cutting blade for your jigsaw at your hardware store or home center. A handheld router with a flush-trimming bit also works well. Spread glue into notches in top. If joints won't go together by hand, knock them together with a rubber mallet or dead blow hammer. Drill pilot holes through box into the wall, remove box and drive the anchors into the wall at the marks. You may need to move brackets or add holes to remount narrowed shelves. Leave trellis frame on a flat surface until the adhesive hardens, then attach lattice to rungs.
You also have to keep it away from flames and pilot lights. This triple-thick assembly method makes framing members very strong, which allows for longer spans and wider spacing between members. You can build this built-in bookcase by following (find) our clear drawings and step-by-step photos, or use these techniques to modify dimensions for your own space. Simply set the depth of craft and you're ready to rout. It is ok people to make a mistake or find a better way, you learn from it. Using too much glue won't adversely affect strength of joint, but it would make a mess that would require extra time to clean up.
Check out these other genius sanding tips. Brush rubber on thick into the corners, seams, screw holes and defects in wood. It's an astounding effect, easy to create, and ideal for modern bedrooms. Ask for one at a local concrete products dealer. Cut the stiles to length, then glue and clamp them together. Screw and glue the column support block to the end of column. Make sure the corners are right-angled and align edges with attention. Leave clamps on two hours and let the glue cure overnight before using power tools on sections. Nail plates to the studs with 16d cement-coated framing nails.
Add the baseboard and apply finish to complete project. We also designed it so all of the cutting could be done on a table saw, the most versatile power tool ever invented. Use a rip guide on your circular saw or a table saw if you have one. Cedar is a better choice if your chairs are going to spend much time out in rain. Apply glue to one of the vertical members and nail it to the case so its edge is flush with the side. Make same cuts on top and bottom of edge boards as shown. Stands like this are particularly useful if you want to sand lots of small parts-for example, if you're making lots of wooden toys.
Unlike with conventional wood siding, the nails will all be hidden by the next course. A scrap of pegboard is a perfect template to position the support holes. Slide the lattice into the groove and fasten the crossbar. Look for boards with similar color and grain patterns. Countersink hole and screw the ends to the rod. A cordless drill with an adjustable clutch is ideal tool used to cut your pocket holes, but make certain to adjust your jig and bit to correct lumber thickness and hole depth. Scrape away glue carefully without gouging lumber surface. With a small brush and a little bit of water, wipe away excess glue seeping from the joints.
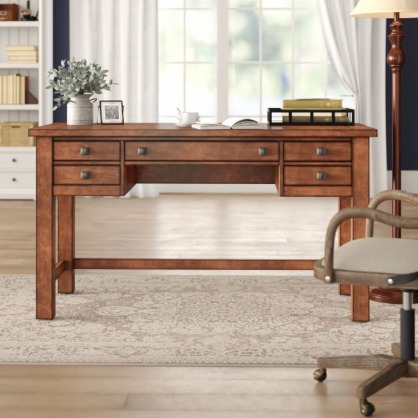
Mark position of the special T-nut on the underside of the desktop. Now you're ready to take the three measurements to determine sizes of the drawers. Next glue the tenons to opposite ends of the rails, then align remaining stile. Then sand the curves to get rid of saw marks and smooth them out. After all, it's quicker and runny concrete is easier to pour. Trim-head screws have several advantages over nails. If you choose maple cabinets as we did, use birch plywood for this project. The pipe parts are available at home centers, hardware stores and plumbing stores. Buy your black pipe at a hardware store and have it rip to exact lengths without threaded ends.
Plane the transition piece on curve of seat and at leading edge of the front seat slat for maximum comfort. Clamps could pull the frames and warp them if you're not careful. If you don't have power equipment for cutting accurate miters, you can do it by hand, or simply craft the pieces squarely to length and use butt joints.